Angular Reactive Form Validation
In this tutorial we will learn about Reactive Forms and how to create reactive forms in angular. We will also make use of the classes avaliable to create in reactive form module.
Angular Form Introduction
Forms are an important part of any web application. Practically every application comes with different forms to be filled in by the users. So it is used to perform many data-entry tasks. You can build almost any kind of form with an Angular template such as login forms, contact forms and any business form.
Some basic things related to the angular form:
Form Control
Form Control is a class that enables validation. For each input field an instance of this class is created. So it show the validation for each HTML Element.
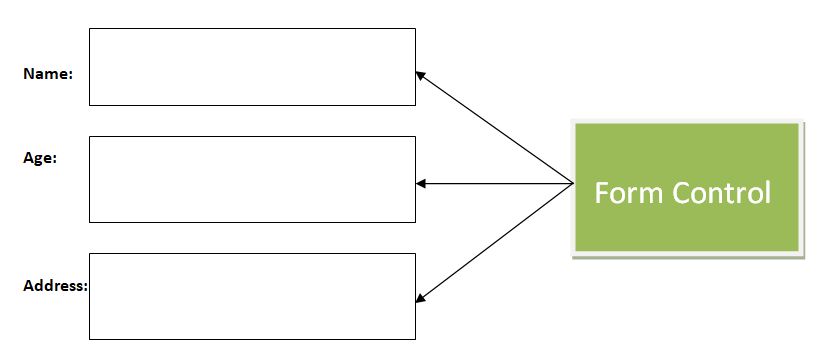
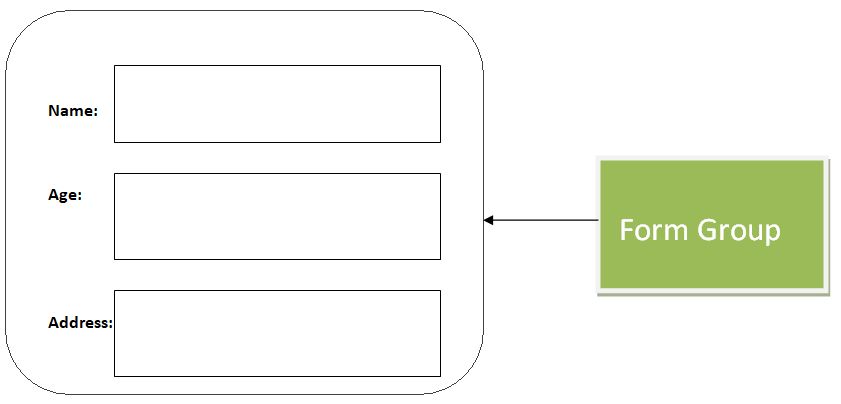
Form Group Control
FormGroup class represents a group of controls. A form can have multiple control groups. The Form Group class returns true if all the controls are valid and also provides validation errors, if any.
There are two different approaches to handling user input through forms in Angular.
- Template Driven Form
- Reactive Form
Read More about Template Driven Form.....
Angular Reactive Form
The below points defines the Angular Reactive Form.
- Angular Reactive Forms are also called Model Driven Form that means we write the code inside the component class and also map the objects to the form controls on the view.
- The Reactive approach removes validation logic from the template, keeping the templates cleaner.It use an immutable approach to manage the state of a form.
- Each time a change occurs to the form, the FormControl instance will not update the existing data model, it will return a new state (a new data model).
- Reactive forms are synchronous when form inputs and values are provided as streams of input values, which can be accessed in a synchronous way.
- Reactive forms are synchronous makes scaling easier. It is reusable and helps a lot with large-scale forms.
- It provides synchronous access to the form and data models, and it can be tested without rendering the UI. So testing is easy.
Creating React Form
When we create any reactive form in angular the following steps should make easy:
- Add Reactive Forms Module
- Import required module in Component
- Using FormGroup class
- Submitting Form
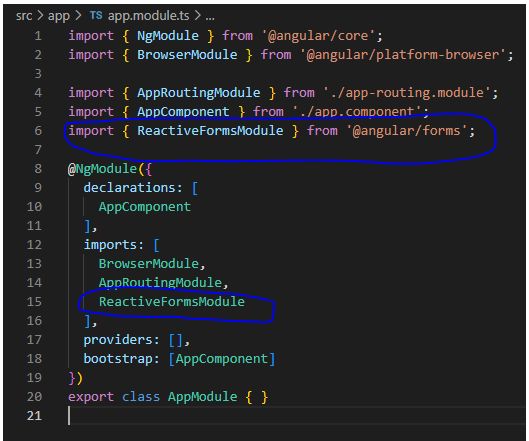
Step 1: Add Reactive Forms Module
When we start working with reactive forms, firstly add ReactiveFormsModle in the App Module as shown in the below image.
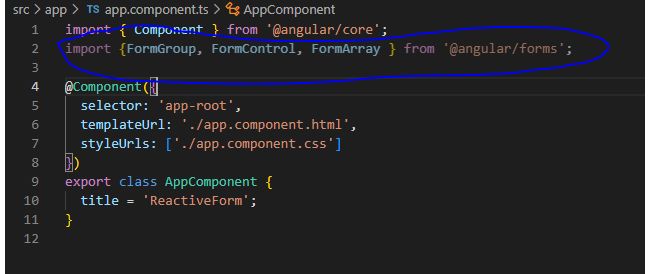
Step 2: Import Required module in Component
After first step we import as required reactive forms classes such as FormGroup, FormControl, FormArray in the components class. After importing the classes, your code will look something like this.
Step 3: Using FormGroup class
FormGroup as name suggested is a group of FormControls. You can encapsulate various FormControls inside a FormGroup. If you use single control then you use formcontrl class. Here we have created a Employee form, which is a FormGroup. It consists of group of controls for Firsname, lastname, Email etc. It is very easy to use a FormGroup on the view as shown below:
<form (ngSubmit)='EmployeeRegister()' [formGroup]='EmployeeForm'>
<p>employee Form</p>
<p>
<label for="firstname">First Name</label>
<input type="text" name="firstname" formControlName="firstname">
</p>

<p>
<label for="lastname">Last Name</label>
<input type="text" name="lastname" formControlName="lastname">
</p>

<p>
<label for="email">Email </label>
<input type="text" id="email" name="email" formControlName="email">
</p>

<p>
<label for="gender">Geneder</label>
<input type="radio" value="male" name="gender" formControlName="gender"> Male
<input type="radio" value="female" name="gender1" formControlName="gender"> Female
</p>
<p>
<button type="submit">Submit</button>
</p>
</form>
<router-outlet></router-outlet>
In the above code form group name is EmployeeForm and when we click on the button it will call EmployeeRegister() method in ts file.
<form (ngSubmit)='EmployeeRegister()' [formGroup]='EmployeeForm'>
Step 4: Submitting Form
In the component class, you can add a function as named EmployeeRegister() to submit the form as shown below:
import { Component } from '@angular/core';
import {FormGroup, FormControl, FormArray } from '@angular/forms';

@Component({
  selector: 'app-root',
  templateUrl: './app.component.html',
  styleUrls: ['./app.component.css']
})
export class AppComponent {

  title = 'ReactiveForm';
  EmployeeForm = new FormGroup({
    firstname: new FormControl(),
    lastname: new FormControl(),
    email: new FormControl(),
    gender: new FormControl()

});

  EmployeeRegister() {
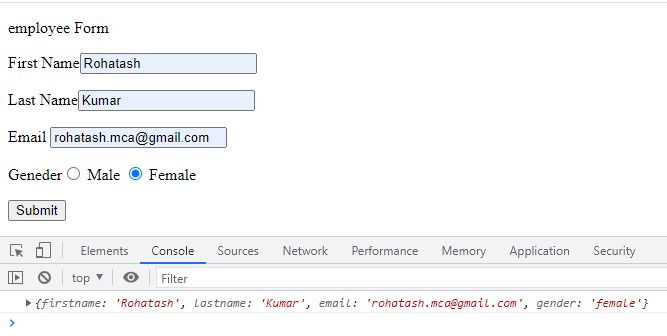
    console.log(this.EmployeeForm.value);
  }
}
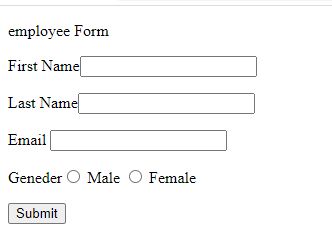
Now fill the form and click on submit button and press F12 to show the console output.
Prev Next
