SQL-Not Null Constraint
In this tutorial, you will learn how to use the SQL Server NOT NULL constraint to ensure that the column of the table on which it is defined can not be left blank.
NOT NULL Constraint
By default, if you don't specify the NOT NULL constraint, a table column can hold NULL values. Not Null Constraint enforces that the column in which not null constraint is defined can not contains null values. Not Null constraints can only be defined at the column level only. It ensures that the column of the table on which it is defined can not be left blank.
A table column always contain a value, which means that you cannot insert a new record, or update a record without adding a value to this field.
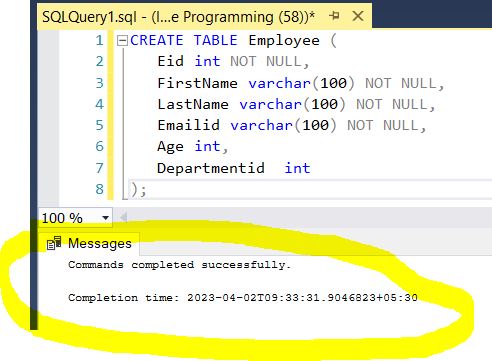
The following example create a table with NOT NULL constraints for the columns: FirstName, LastName, and Emailid when the Employee table is created:
CREATE TABLE Employee (
Eid int NOT NULL,
FirstName varchar(100) NOT NULL,
LastName varchar(100) NOT NULL,
Emailid varchar(100) NOT NULL,
Age int,
Departmentid int
);
Output

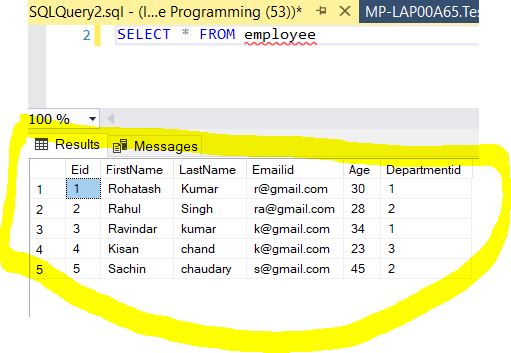
Now insert Some data in Employee table.

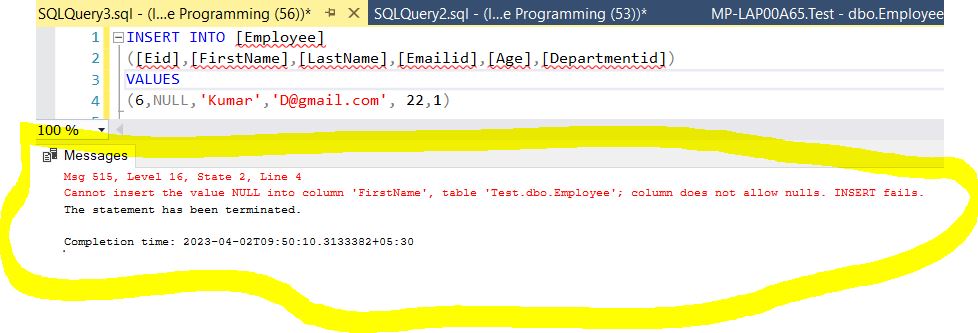
Now Try to insert column NULL value in FirstName Column. It show the following message.

Adding NOT NULL Constraint
To add the NOT NULL constraint to an existing column, you should follow these simple steps:
First - update the table so there is no NULL in the column:
UPDATE Employee
SET Age =  -- Define any value
WHERE Age IS NULL;
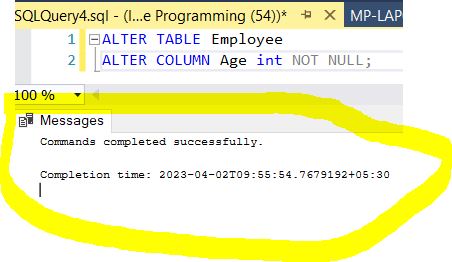
Second - To create a NOT NULL constraint on the Age column when the Employee table is already created, use the following SQL:
ALTER TABLE Employee
ALTER COLUMN Age int NOT NULL;
Output

Removing NOT NULL Constraint
To remove the NOT NULL constraint from a column, you can use the ALTER TABLE ALTER COLUMN statement as follows:
ALTER TABLE Employee
ALTER COLUMN Age int NULL;
Output

I n this tutorial, you will learn how to use the SQL Server UNIQUE constraint to ensure that the data stored in a column, or a group of columns, is unique among the rows in a table.
Next
