Angular Directives
In this post we will learn how to use directive in angular. We'll see the different types of directives with example.
Directives in Angular
Directives are classes that are used to add additional behavior or modify the existing behavior to the elements in the application. Basically directives are usedto manipulate(adding, removing, updteing) the DOM elements or changing the view of the DOM elements.
Types of Angular
There are Three types of directives in Angular. Angular directives are as follows:
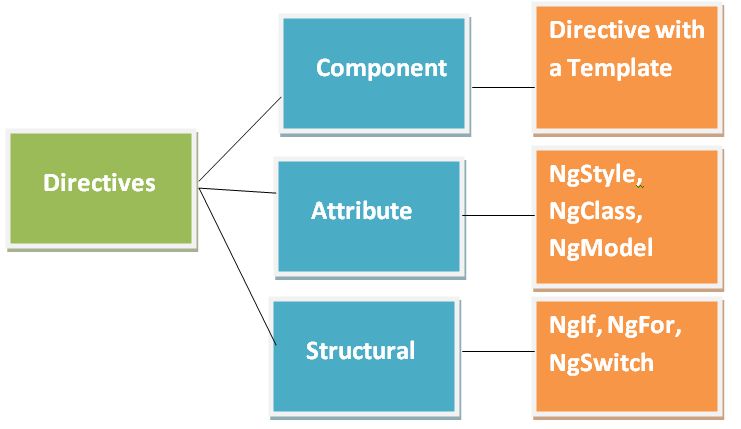
- Components Directives
- Attribute Directives
- Structural Directives
1. Component directives
It is used with a template. The directives are used to manipulate the DOM and component is showing something in DOM so we can say component is also a directive with a template. The Angular Components are defined using @Component Decorator.
The Components consists of three main building blocks of code.
1. Template - The Templates are -
nothing but
HTML codes along with the Angular specific HTML markups and directives.
2.
Class - In class which is written in TypeScript. we use to write logic to the
View. Class Contains the Properties & Methods. The Properties of a class can be
bind to the view using Data Binding.
export class AppComponent {
title =
'ComponentDemo';
}
3. MetaData -A decorator is a function that adds metadata to class, its methods & to its properties. MetaData Provides additional information about the component to the Angular.
@Component({
  selector: 'app-root',
  templateUrl: './app.component.html',
  styleUrls: ['./app.component.css']
})
The above @Component decorator consists following:
Selector - It specifies the tag that can be used to call or
render this component in HTML name with .
TemplateUrl - It is used to
indicates the path of the HTML template that will be used to display or render
this component.
StyleUrls - It is used to specifies an array of URLs for CSS
style-sheet in the component.
To Read More about component....
2. Attribute directives
It is used to alter or change the appearance or behavior of an element, component, or another directive. The most useful common attribute directives are as following:
- NgClass
- NgStyle
- NgModel
1. NgClass Directive
As name suggested it is used to add and remove a set of CSS classes. The following is the basic example of One way ngClass.
<div [ngClass]="'ClassName'"></div>For example, we create a array of cricketer name and country in app.component.ts file.
import { Component } from '@angular/core';

@Component({
selector: 'app-root',
templateUrl: './app.component.html',
styleUrls: ['./app.component.css']
})
export class AppComponent {
Cricketer: any[] = [
{
"name": "Broad",
"country": 'UK'
},
{
"name": "Hayden",
"country": 'AUS'
},
{
"name": "Virat",
"country": 'India'
},
{
"name": "Sangkara",
"country": 'Srilanka'
},
];
}
Now we will apply different classes using ngClass directive. Add the following code to the app.component.html
<div class="container">
<style>
.NGClasscheck
{
background-color:green;
}
.UKClass
{
background-color:green;
}
.AUSClass
{
background-color:palegoldenrod;
}
.SrilankaClass
{
background-color:blueviolet;
}
.IndiaClass
{
background-color:blue;
}
</style>
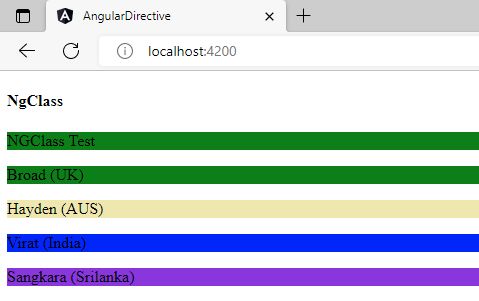
<h4>NgClass</h4>
<div [ngClass]="'NGClasscheck'">NGClass Test</div>
<div *ngFor="let cricobj of Cricketer">
<p [ngClass]="{
'UKClass':cricobj.country === 'UK',
'AUSClass':cricobj.country === 'AUS',
'IndiaClass':cricobj.country === 'India',
'SrilankaClass':cricobj.country === 'Srilanka'
}
">{{ cricobj.name }} ({{ cricobj.country }})
</p>
</div>
</div>
<router-outlet></router-outlet>
Now run the Application and test it with created class background color.
2. NgStyle Directive
As name suggested it is used to add and remove a set of HTML styles. The following is the basic example of One way ngStyle.
<div [ngStyle]="{'background-color':'green'}"></<div>For example, we create a array of cricketer name and country in app.component.ts file.
import { Component } from '@angular/core';

@Component({
selector: 'app-root',
templateUrl: './app.component.html',
styleUrls: ['./app.component.css']
})
export class AppComponent {
Cricketer: any[] = [
{
"name": "Broad",
"country": 'UK'
},
{
"name": "Hayden",
"country": 'AUS'
},
{
"name": "Virat",
"country": 'India'
},
{
"name": "Sangkara",
"country": 'Srilanka'
},
];
}
Now we define the ngstyle directive. Add the following code to the app.component.html
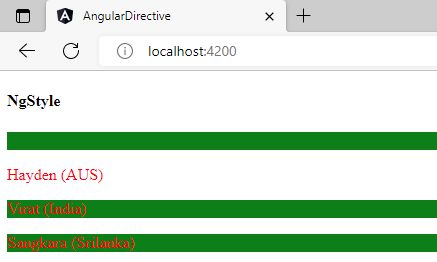
<h4>NgStyle</h4>
<div *ngFor="let cricobj1 of Cricketer">
<p [ngStyle]="{
'color': cricobj1.country === 'UK' ? 'green': 'red',
'background-color': cricobj1.country === 'AUS' ? 'ping': 'green'}">
{{cricobj1.name}} ({{cricobj1.country}})</p>
</div>
<h4>NgModel</h4>
<input type="text" [(ngModel)]="EmployeeName">
<input type="text" [(ngModel)]="EmployeeAge">
<p>Employee Name is: {{EmployeeName}}</p>
<p>Employee Age is: {{EmployeeAge}}</p>
Now run the Application and test it with created class background color.
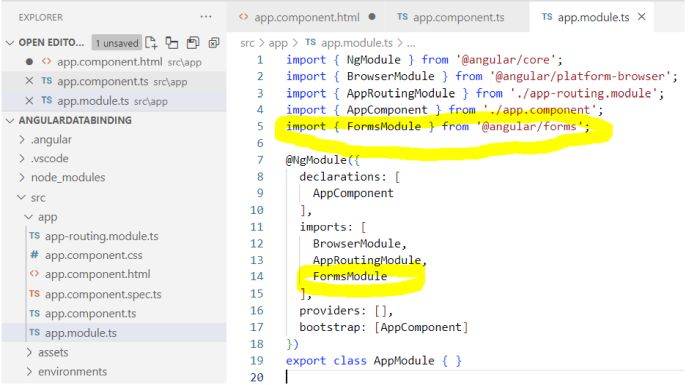
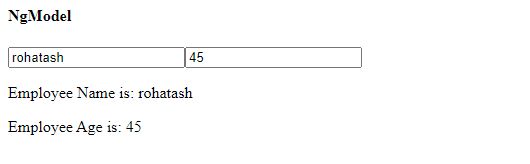
3. NgModel Directive
It is used to add two-way data binding to an HTML form element. To use import FormsModule into App.module.ts file of the application need to include it into imports array.
In two way data binding you use ngModel directive and it is used such as [(ngModel)] in template file(HTML file).
Add the following code in component.ts file.
//Two way data Binding
EmployeeName:string="";
EmployeeAge:Number=0;
Add the following code on template or html file
<h4>NgModel</h4>
<input type="text" [(ngModel)]="EmployeeName">
<input type="text" [(ngModel)]="EmployeeAge">
<p>Employee Name is: {{EmployeeName}}</p>
<p>Employee Age is: {{EmployeeAge}}</p>
Now, if you update the value of input text-box in our view it will automatically update in the name and age property of our component and vice-versa in view. So it is called two way binding.
3. Structural Directives
It is used to Change the DOM layout by adding and removing DOM(Data object model) elements in HTML template file.
- NgIf
- NgFor
- NgSwitch
1. NgIf Directive
It is a special conditional directive as we used in earlier languages as IF condition. It is used to create conditionally subview from the template.
For example, we create a array of cricketer name and country in app.component.ts file.
import { Component } from '@angular/core';

@Component({
selector: 'app-root',
templateUrl: './app.component.html',
styleUrls: ['./app.component.css']
})
export class AppComponent {
Cricketer: any[] = [
{
"name": "Broad",
"country": 'UK'
},
{
"name": "Hayden",
"country": 'AUS'
},
{
"name": "Virat",
"country": 'India'
},
{
"name": "Sangkara",
"country": 'Srilanka'
},
];
}
Now we define the ngIf directive. Add the following code to the app.component.html
<h4>NgIF</h4>
<div *ngFor="let cricobj2 of Cricketer">
<p *ngIf="cricobj2.country!='UK'"> {{cricobj2.name}} ({{cricobj2.country}})</p>
</div>
Output

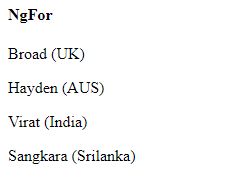
2. NgFor Directive
It is a special loop directive as we used in earlier languages as FOR Loop. it is used to repeat or loop a node for each item in a list.
For example, we create a array of cricketer name and country in app.component.ts file.
import { Component } from '@angular/core';

@Component({
selector: 'app-root',
templateUrl: './app.component.html',
styleUrls: ['./app.component.css']
})
export class AppComponent {
Cricketer: any[] = [
{
"name": "Broad",
"country": 'UK'
},
{
"name": "Hayden",
"country": 'AUS'
},
{
"name": "Virat",
"country": 'India'
},
{
"name": "Sangkara",
"country": 'Srilanka'
},
];
}
Now we define the ngFor directive. Add the following code to the app.component.html
<h4>NgFor</h4>
<div *ngFor="let cricobj1 of Cricketer">
<p> {{cricobj1.name}} ({{cricobj1.country}})</p>
</div>
Output
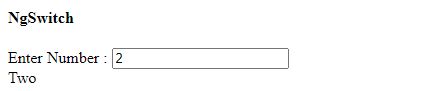
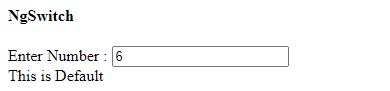
3. NgSwitch Directive
It is a special case directive as we used in earlier languages as switch statement. A set of directives that switch among alternative views. It renders every view that matches on template file. If there are no matches, the view will render with the NgSwitchDefault directive.
For example, we create a array of cricketer name and country in app.component.ts file.
import { Component } from '@angular/core';

@Component({
selector: 'app-root',
templateUrl: './app.component.html',
styleUrls: ['./app.component.css']
})
export class AppComponent {
Cricketer: any[] = [
{
"name": "Broad",
"country": 'UK'
},
{
"name": "Hayden",
"country": 'AUS'
},
{
"name": "Virat",
"country": 'India'
},
{
"name": "Sangkara",
"country": 'Srilanka'
},
];

// For NGSwitch
numbercount: number= 0;
}
Now we define the NgSwitch directive. Add the following code to the app.component.html
<h4>NgSwitch</h4>
Enter Number : <input type='text' [(ngModel)]="numbercount" />
<div [ngSwitch]="numbercount">
<div *ngSwitchCase="'1'">One</div>
<div *ngSwitchCase="'2'">Two</div>
<div *ngSwitchCase="'3'">Three</div>
<div *ngSwitchCase="'4'">Four</div>
<div *ngSwitchCase="'5'">Five</div>
<div *ngSwitchDefault>This is Default</div>
Output
Now run the application the whole application.
Add the following code to the app.component.ts
import { Component } from '@angular/core';

@Component({
  selector: 'app-root',
  templateUrl: './app.component.html',
  styleUrls: ['./app.component.css']
})
export class AppComponent {
  Cricketer: any[] = [
    {
      "name": "Broad",
      "country": 'UK'
    },
    {
      "name": "Hayden",
      "country": 'AUS'
    },
    {
      "name": "Virat",
      "country": 'India'
    },
    {
      "name": "Sangkara",
      "country": 'Srilanka'
    },
  ];
  //Two way data Binding
EmployeeName:string="";
EmployeeAge:Number=0;

// For NGSwitch
numbercount: number= 0;
}
Add the following code to the app.component.html
<div class="container">
<style>
.NGClasscheck
{
background-color:green;
}
.UKClass
{
background-color:green;
}
.AUSClass
{
background-color:palegoldenrod;
}
.SrilankaClass
{
background-color:blueviolet;
}
.IndiaClass
{
background-color:blue;
}

</style>
<h4>NgClass</h4>
<div [ngClass]="'NGClasscheck'">NGClass Test</div>

<div *ngFor="let cricobj of Cricketer">
<p [ngClass]="{
'UKClass':cricobj.country === 'UK',
'AUSClass':cricobj.country === 'AUS',
'IndiaClass':cricobj.country === 'India',
'SrilankaClass':cricobj.country === 'Srilanka'
}
">{{ cricobj.name }} ({{ cricobj.country }})
</p>
</div>
</div>

<h4>NgStyle</h4>
<div *ngFor="let cricobj1 of Cricketer">
<p [ngStyle]="{
'color': cricobj1.country === 'UK' ? 'green': 'red',
'background-color': cricobj1.country === 'AUS' ? 'ping': 'green'}">
{{cricobj1.name}} ({{cricobj1.country}})</p>
</div>
<h4>NgModel</h4>
<input type="text" [(ngModel)]="EmployeeName">
<input type="text" [(ngModel)]="EmployeeAge">
<p>Employee Name is: {{EmployeeName}}</p>
<p>Employee Age is: {{EmployeeAge}}</p>


<h4>NgIF</h4>
<div *ngFor="let cricobj2 of Cricketer">
<p *ngIf="cricobj2.country!='UK'"> {{cricobj2.name}} ({{cricobj2.country}})</p>
</div>

<h4>NgFor</h4>
<div *ngFor="let cricobj1 of Cricketer">
<p> {{cricobj1.name}} ({{cricobj1.country}})</p>
</div>


<h4>NgSwitch</h4>
Enter Number : <input type='text' [(ngModel)]="numbercount" />
<div [ngSwitch]="numbercount">
<div *ngSwitchCase="'1'">One</div>
<div *ngSwitchCase="'2'">Two</div>
<div *ngSwitchCase="'3'">Three</div>
<div *ngSwitchCase="'4'">Four</div>
<div *ngSwitchCase="'5'">Five</div>
<div *ngSwitchDefault>This is Default</div>

<router-outlet></router-outlet>
Now run the application and output will show on browser looks like that:

Prev Next