Authentication and Authorization in .NetCore
In the previous article we have generated JWT token. You can also go through the blow link.
Now we check the token validate with expire time and also alter token to access it. In the previous code now need to add the following folder named TokenMiddleware.
Before we start, we should know what Authentication is.
In simple words we can say, Authentication is validating the user with credentials or identity.
Authentication and Authorization in ASP.NET Core
1. Authentication
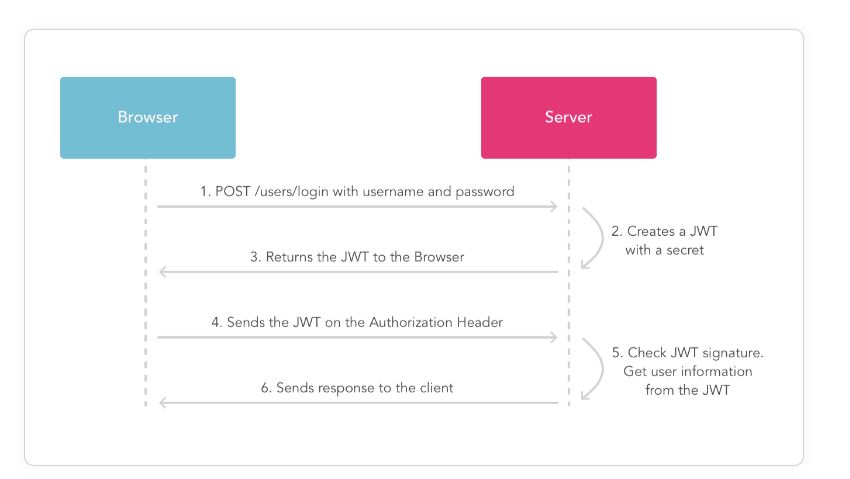
Authentication is the process of verifying the identity of a user or service. It's about confirming "Who are you?" by checking credentials such as username and password or a digital certificate.
How it works
- A user submits their credentials (e.g., username and password) through a login interface.
- ASP.NET Core uses the configured Identity Provider (e.g., database, external OAuth provider like Google) to validate these credentials.
- If valid, the system generates a token (e.g., JWT) or sets a cookie containing claims about the user.
- The user is now "authenticated" and can be identified by the application on subsequent requests.
Example
Logging into an application with a username and password. Once verified, the system knows who you are.
2. Authorization
Authorization determines what resources or actions an authenticated user can access. It answers the question, "What can you access?"
How it works
- After authentication, each request is checked against policies or roles defined in the application.
- ASP.NET Core checks if the authenticated user has permission (based on roles, claims, or policies) to access a particular resource or execute a specific action.
- If permitted, access is granted; otherwise, it's denie
Example
After logging in, you may only have access to your own profile page but not to other users' profiles if you lack the necessary role or permission.
Key Differences
- Authentication - is about verifying identity. It confirms who the user is.
- Authorization - is about access control. It determines what the user can do.
How Authentication and Authorization Work Together in ASP.NET Core:
-
First Step - Authentication:
1. Authentication in .NetCore Web API
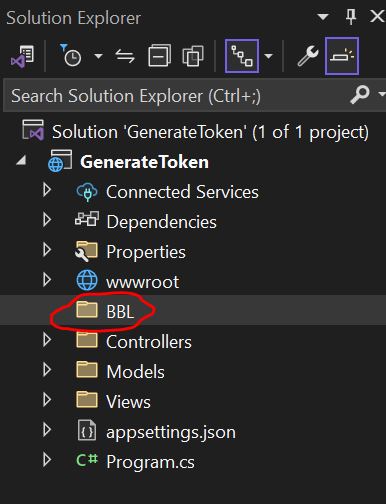
Step 1: Create a Folder name BBL and Middleware named TokenMiddleware
Now we write click on the project and add a folder named BBL.
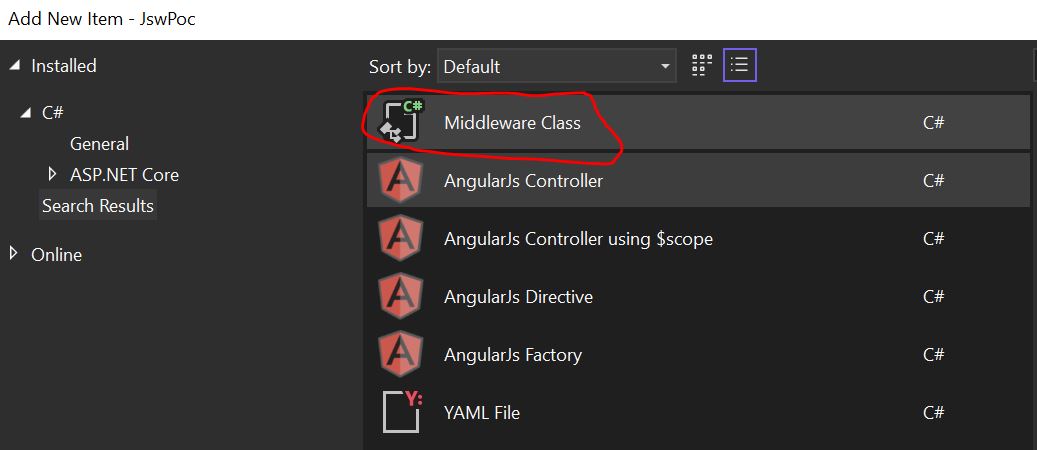
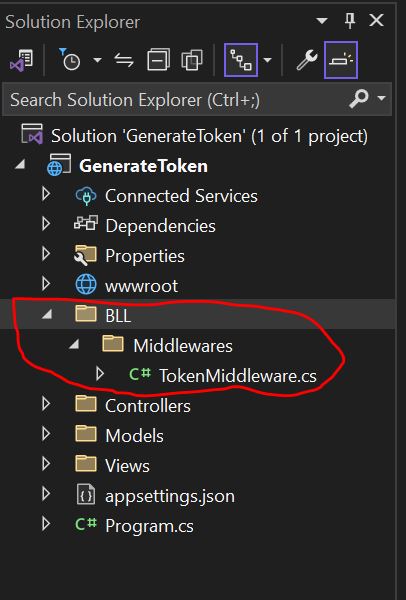
Now right click on the BBL folder and add one more folder named Middlewares and choose Add -> New Item ->Middleware.cs file. We have changed name as TokenMiddleware.cs
Now after adding it looks like that
The given code snippet defines a middleware in a .NET Core Web API project. Let’s break down the methods, properties, and their purpose in the code.
using System.IdentityModel.Tokens.Jwt;
using System.Security.Claims;
using System.Text;
using Microsoft.Extensions.Configuration;
using Microsoft.IdentityModel.Tokens;

namespace JswPoc.BLL.Middlewares
{
    public class TokenMiddleware
    {
        private readonly RequestDelegate _next;
        private readonly IConfiguration _configuration;

        public TokenMiddleware(RequestDelegate next, IConfiguration configuration)
        {
            _next = next;
            _configuration = configuration;
        }

        public async Task Invoke(HttpContext context)
        {
            // Check if the request contains a valid token
            if (context.Request.Headers.TryGetValue("Authorization", out var token) && !string.IsNullOrWhiteSpace(token))
            {
                try
                {
                    //var tokenHandler = new JwtSecurityTokenHandler();
                    //var jwtToken = tokenHandler.ReadJwtToken(token[0].Split(' ')[1]);
                    var jwtToken = context.Request.Headers["Authorization"].FirstOrDefault()?.Split(" ").Last();
                    if (jwtToken != null)
                    {
                        AttachUserToContext(context, jwtToken);
                    }
                }
                catch (Exception ex)
                {
                    // Handle token validation or parsing errors here
                    // You can log the error or return an unauthorized response
                    context.Response.StatusCode = StatusCodes.Status401Unauthorized;
                    await context.Response.WriteAsync("Invalid token: " + ex.Message);
                    return;
                }
            }
            // Call the next middleware in the pipeline
            await _next(context);
        }

        private async Task AttachUserToContext(HttpContext context, string token)
        {
            try
            {
                var tokenHandler = new JwtSecurityTokenHandler();
                var key = Encoding.ASCII.GetBytes(_configuration["Jwt:Key"]);
                tokenHandler.ValidateToken(token, new TokenValidationParameters
                {
                    ValidateIssuerSigningKey = true,
                    IssuerSigningKey = new SymmetricSecurityKey(key),
                    ValidateIssuer = true,
                    ValidateAudience = true,
                    ValidIssuer = _configuration["Jwt:Issuer"],
                    ValidAudience = _configuration["Jwt:Audience"],
                    ValidateLifetime = true,
                    ClockSkew = TimeSpan.Zero // Optional: To set the expiration time tolerance
                }, out SecurityToken validatedToken);

                var jwtToken = (JwtSecurityToken)validatedToken;
                // var Claims = jwtToken.Claims.ToList();

                // Extract user claims from the token
                var claims = jwtToken.Claims.ToList();

                // Create a ClaimsIdentity and set it in the HttpContext
                var claimsIdentity = new ClaimsIdentity(claims, "jwt");
                context.User = new ClaimsPrincipal(claimsIdentity);

            }
            catch (Exception ex)
            {
                // You can log the error or return an unauthorized response
                context.Response.StatusCode = StatusCodes.Status401Unauthorized;
                await context.Response.WriteAsync("Invalid token: " + ex.Message);
                return;
            }
        }
    }
}
1. TokenMiddleware Class
The TokenMiddleware class is a custom middleware that intercepts HTTP requests as they pass through the request pipeline.
-
Namespace: GenerateToken.BLL.Middlewares
-
Purpose: The middleware does not perform any specific task in its current implementation. It simply forwards the request to the next middleware in the pipeline.
Properties and Methods of TokenMiddleware
-
private readonly RequestDelegate _next;
- Type: RequestDelegate
- Purpose: This delegate represents the next middleware component in the request pipeline.
- Usage: The RequestDelegate is stored in the _next field, and when invoked, it forwards the current HTTP context to the next middleware in the pipeline.
-
public TokenMiddleware(RequestDelegate next)
- Type: Constructor
- Parameter: RequestDelegate next
- Purpose: Initializes the TokenMiddleware with the next middleware in the pipeline.
- Usage: This constructor assigns the incoming RequestDelegate to the
_next field so that it can be invoked later to pass the request down the
pipeline.
-
public Task Invoke(HttpContext httpContext)
-
Type: Method
-
Parameter: HttpContext httpContext
-
Return Type: Task
-
Purpose: The Invoke method is called when the middleware is executed. It processes the incoming HttpContext.
-
Usage: In the current implementation, it simply calls _next(httpContext) to forward the HTTP context to the next middleware.
-
Extension Point: This method is where you would typically add custom logic for the middleware. For example, you could check for a valid JWT token, log requests, or modify the HTTP request/response.
-
2. TokenMiddlewareExtensions Static Class
This static class provides an extension method to register the TokenMiddleware in the middleware pipeline.
- Namespace: GenerateToken.BLL.Middlewares
Methods of TokenMiddlewareExtensions
- public static IApplicationBuilder UseTokenMiddleware(this
IApplicationBuilder builder)
-
Type: Extension Method
-
Parameter: IApplicationBuilder builder
-
Return Type: IApplicationBuilder
-
Purpose: Registers the TokenMiddleware into the HTTP request pipeline.
-
Usage: The method uses builder.UseMiddleware<TokenMiddleware>() to add the custom middleware to the request pipeline.
-
this Keyword: The this keyword in the method signature makes this an extension method for the IApplicationBuilder interface. This allows you to call it like a built-in middleware extension method, such as UseRouting() or UseAuthentication().
-
Step 2: Configure the Application in Program.cs
Open the Program.cs file and add the following configurations and add the Middleware.
using GenerateToken; using GenerateToken.Data; using JswPoc.BLL.Middlewares; using Microsoft.AspNetCore.Authentication.JwtBearer; using Microsoft.AspNetCore.Identity; using Microsoft.EntityFrameworkCore; using Microsoft.Extensions.DependencyInjection; using Microsoft.IdentityModel.Tokens; using System.IdentityModel.Tokens.Jwt; using System.Text; var builder = WebApplication.CreateBuilder(args); // Add services to the container. var connectionString = builder.Configuration.GetConnectionString("DefaultConnection"); builder.Services.AddDbContext<GenerateToken.Data.ApplicationDbContext>(options => options.UseSqlServer(connectionString)); builder.Services.AddIdentity<IdentityUser, IdentityRole>() .AddEntityFrameworkStores<ApplicationDbContext>() .AddDefaultTokenProviders(); builder.Services.AddAuthentication(options => { options.DefaultAuthenticateScheme = JwtBearerDefaults.AuthenticationScheme; options.DefaultChallengeScheme = JwtBearerDefaults.AuthenticationScheme; options.DefaultScheme = JwtBearerDefaults.AuthenticationScheme; }).AddJwtBearer(o => { o.TokenValidationParameters = new TokenValidationParameters { ValidIssuer = builder.Configuration["Jwt:Issuer"], ValidAudience = builder.Configuration["Jwt:Audience"], IssuerSigningKey = new SymmetricSecurityKey (Encoding.UTF8.GetBytes(builder.Configuration["Jwt:Key"])), ValidateIssuer = true, ValidateAudience = true, ValidateLifetime = false, ValidateIssuerSigningKey = true }; }); builder.Services.AddAuthorization();builder.Services.AddScoped<IMaterialService, MaterialService>();// Add services to the container. builder.Services.AddControllersWithViews(); var app = builder.Build(); // Configure the HTTP request pipeline. if (!app.Environment.IsDevelopment()) { app.UseExceptionHandler("/Home/Error"); // The default HSTS value is 30 days. You may want to change this for production scenarios, see https://aka.ms/aspnetcore-hsts. app.UseHsts(); } app.UseHttpsRedirection(); app.UseStaticFiles(); app.UseRouting(); app.UseMiddleware<TokenMiddleware>(); app.UseAuthentication(); app.UseAuthorization(); app.MapControllerRoute( name: "default", pattern: "{controller=Home}/{action=Index}/{id?}"); app.Run();
Step 3: Now Create a Material model inside Data Folder
Add the following code with that.
namespace GenerateToken.Data
{
    public class Material
    {
        public int Id { get; set; }
        public string? ShortText { get; set; }
        public string? MaterialGroup { get; set; }
    }
}
Step 4: Adding Material model in ApplicationDbContext.cs
Add the following code to create material table in SQl db.
using Microsoft.AspNetCore.Identity;
using Microsoft.AspNetCore.Identity.EntityFrameworkCore;
using Microsoft.EntityFrameworkCore;
using System;

namespace GenerateToken.Data
{
    public class ApplicationDbContext : IdentityDbContext<IdentityUser>
    {
       public ApplicationDbContext(DbContextOptions<ApplicationDbContext> options)
       : base(options)
       {
       }
       public DbSet<Material> Materials { get; set; }

    }
}
Step 5: Create and Apply Migrations
- Open the Package Manager Console from Tools > NuGet Package Manager > Package Manager Console.
- Run the following commands to create and apply the migration
PM> Add-Migration InitialCreate
PM> Update-Database
Now run the command.

Now Open the SQL Server database and check it will create automatically Materials table in database.
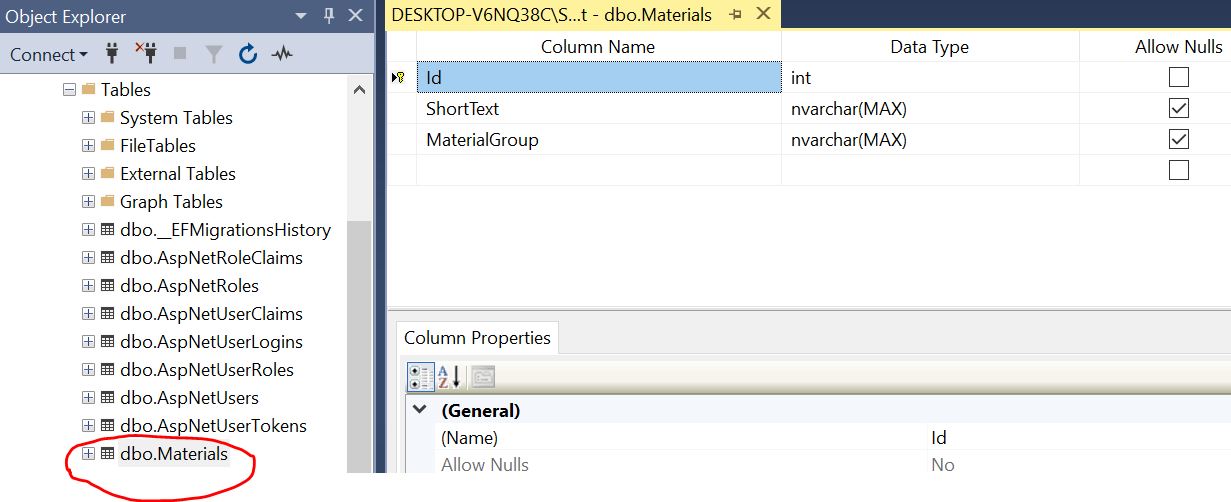
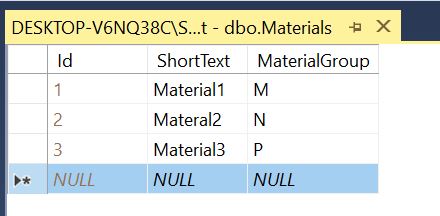
Now insert some data in table manually. or we can also through code.
Step 6: Creating Service inside BBL Folder
Now create a Service folder -> MaterialService.cs File and add the following code. and add the scope of that service inside program.cs file.
using GenerateToken.Data;

namespace GenerateToken.BLL.Services
{
    public interface IMaterialService
    {
        Task<Material?> GetMaterialDetails(int id);
        Task<IEnumerable<Material>> GetMaterials();
    }

    public class MaterialService : IMaterialService
    {
        private readonly ApplicationDbContext context;

        public MaterialService(ApplicationDbContext context)
        {
            this.context = context;
        }

        public async Task<IEnumerable<Material>> GetMaterials()
         => this.context.Materials;

        public async Task<Material?> GetMaterialDetails(int id)
        => this.context.Materials.FirstOrDefault(x => x.Id == id);
    }
}2. Authorization in .NetCore Web API
Step 7: Creating MaterialsController
Open the Controllers folder and add an MaterialsController.cs and add the following code. add the Authorize attribute inside controller as following.
using GenerateToken.BLL.Services;
using Microsoft.AspNetCore.Authorization;
using Microsoft.AspNetCore.Http;
using Microsoft.AspNetCore.Mvc;

namespace GenerateToken.Controllers
{
    [Route("api/[controller]")]
    [ApiController]
    [Authorize]
    public class MaterialsController : ControllerBase
    {
        private readonly IMaterialService materialService;

        public MaterialsController(IMaterialService materialService)
        {
            this.materialService = materialService;
        }

        [HttpGet()]
        [Route("GetMaterials")]
        public async Task<IActionResult> GetMaterials()
        {
            var materials = await materialService.GetMaterials();
            return Ok(materials);
        }

        [HttpGet()]
        [Route("GetMaterialDetails")]
        public async Task<IActionResult> GetMaterialDetails(int id)
        {
            var materials = await materialService.GetMaterialDetails(id);
            return Ok(materials);
        }
    }
}
Authorize Attribute
[Authorize] is an attribute used in ASP.NET Core to enforce authorization on controllers, actions, or pages. It restricts access to specific parts of an application based on the user's identity, roles, claims, or policies. When [Authorize] is applied, the ASP.NET Core framework ensures that only authenticated and/or authorized users can access the specified resources.
Key Concepts of [Authorize]
-
Authentication vs. Authorization:
- Authentication - Verifies the identity of a user. (e.g., using a username and password).
- Authorization - Determines if an authenticated user has access to
certain resources or actions based on roles, claims, or policies.
-
How [Authorize] Works
When a user attempts to access a controller action or page marked with the [Authorize] attribute:
- The middleware checks if the user is authenticated.
- If the user is authenticated, it then checks if the user meets the authorization requirements (e.g., role-based or policy-based).
-
Placement of [Authorize]
- At the Controller/Action Level: Applying [Authorize] at the controller level restricts access to all actions within that controller.
- At the Action Method Level: Applying [Authorize] at a specific action level restricts access to that action only.
Basic Usage of [Authorize]
-
Default [Authorize] Attribute - By default, [Authorize] ensures that only authenticated users can access the resource.
[Authorize] public class HomeController : Controller { public IActionResult Index() { return View(); } } -
Role-Based Authorization - You can restrict access to users with specific roles by specifying roles in the [Authorize] attribute.
[Authorize(Roles = "Admin")] public class AdminController : Controller { public IActionResult Index() { return View(); } } -
Multiple Roles or Policies - You can specify multiple roles or policies as well.
[Authorize(Roles = "Admin, Manager")]
public IActionResult Manage()
{
    return View();
}
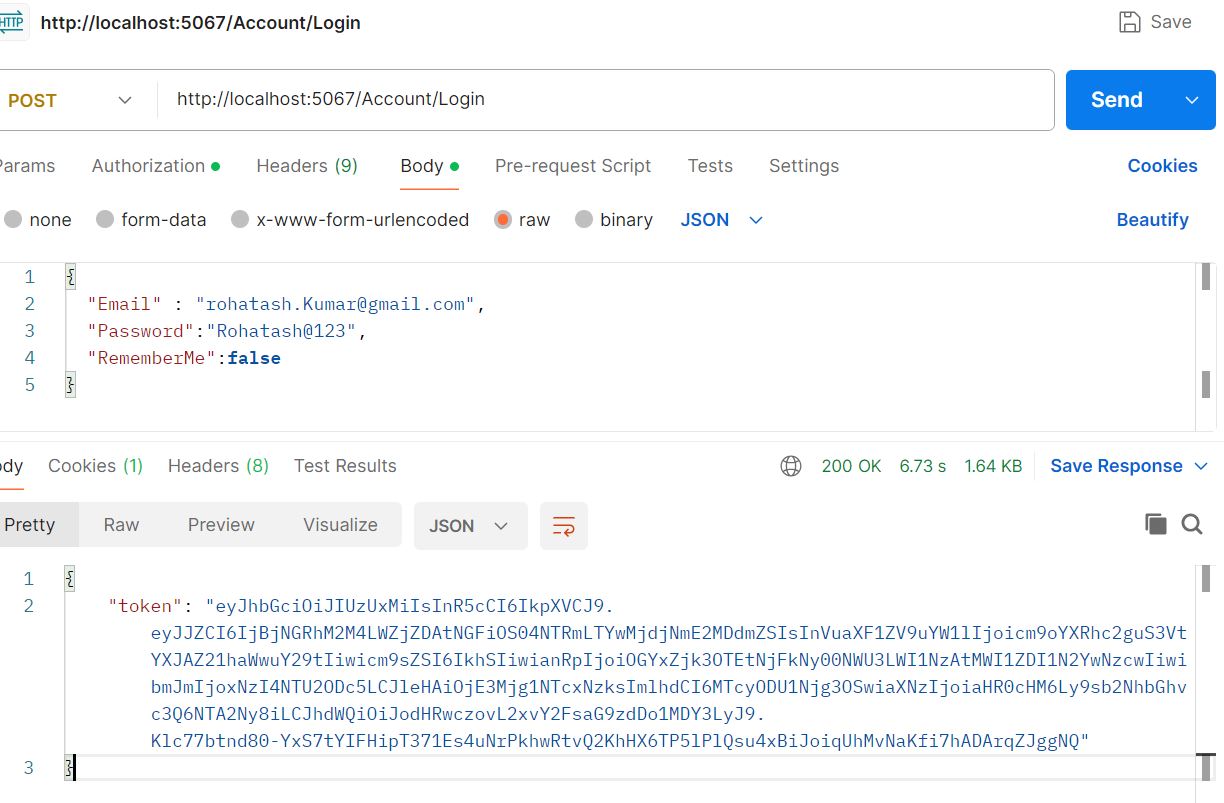
Step 3: Now Generate JWT Token and Test in Postman
Now open the post man and hit the login URL to generate token. In that token we have already set expiry time 5 minutes. So after five minute it will not access.
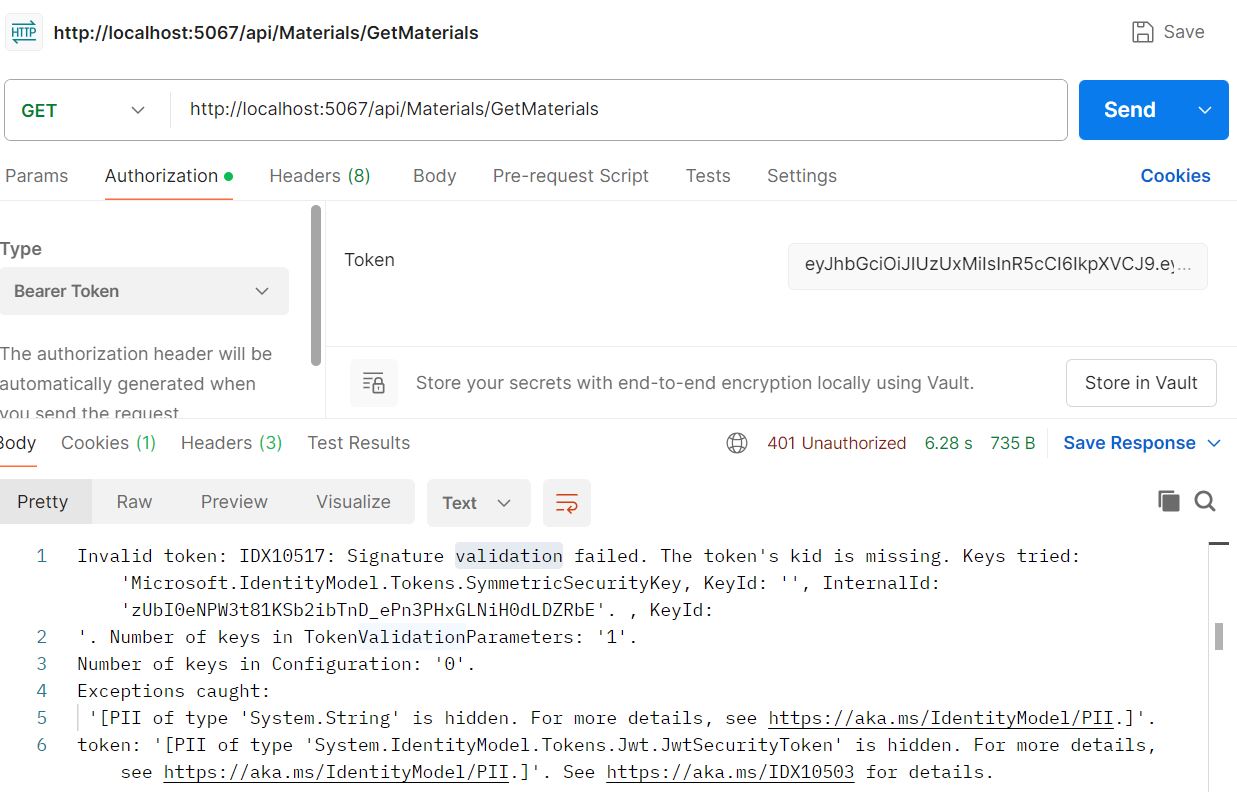
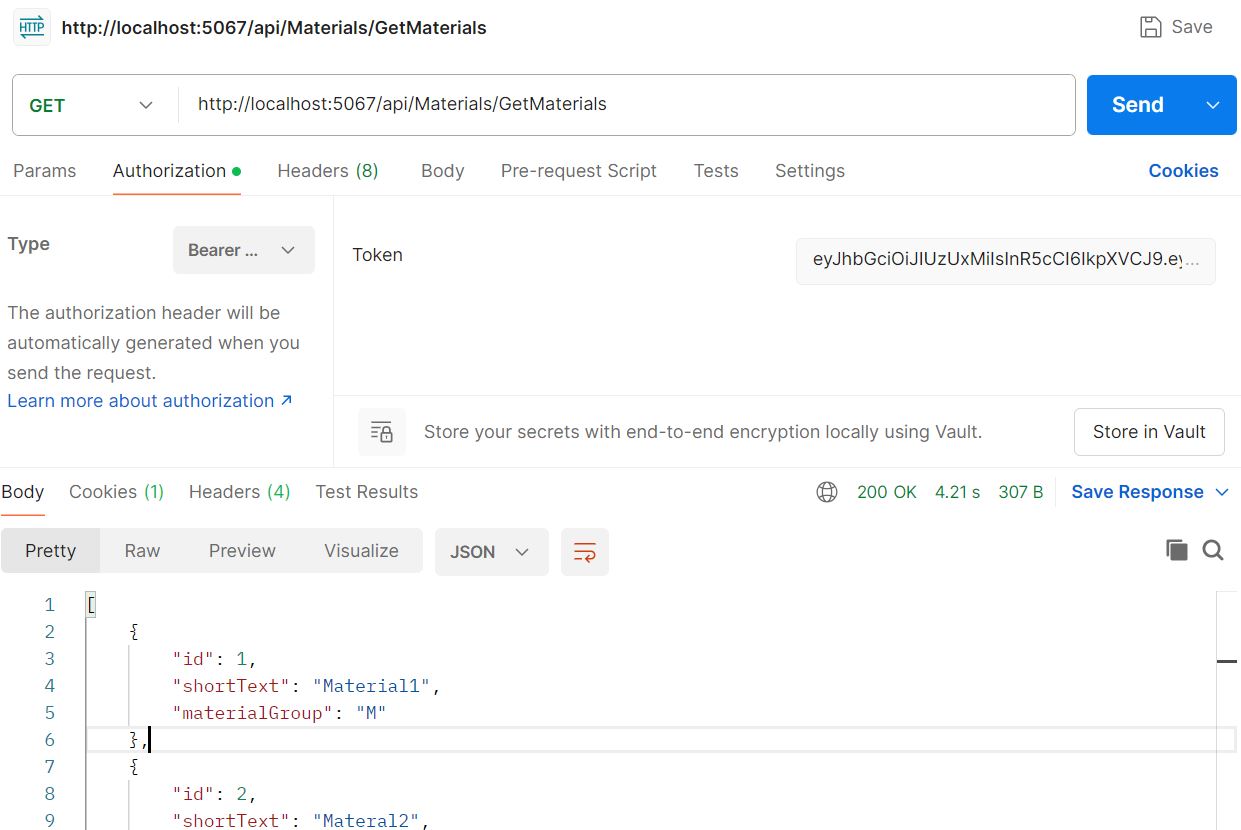
Now access MaterialsController pass generated token in Authorize section and hit the service URL after 5 minute. It will show the following message.
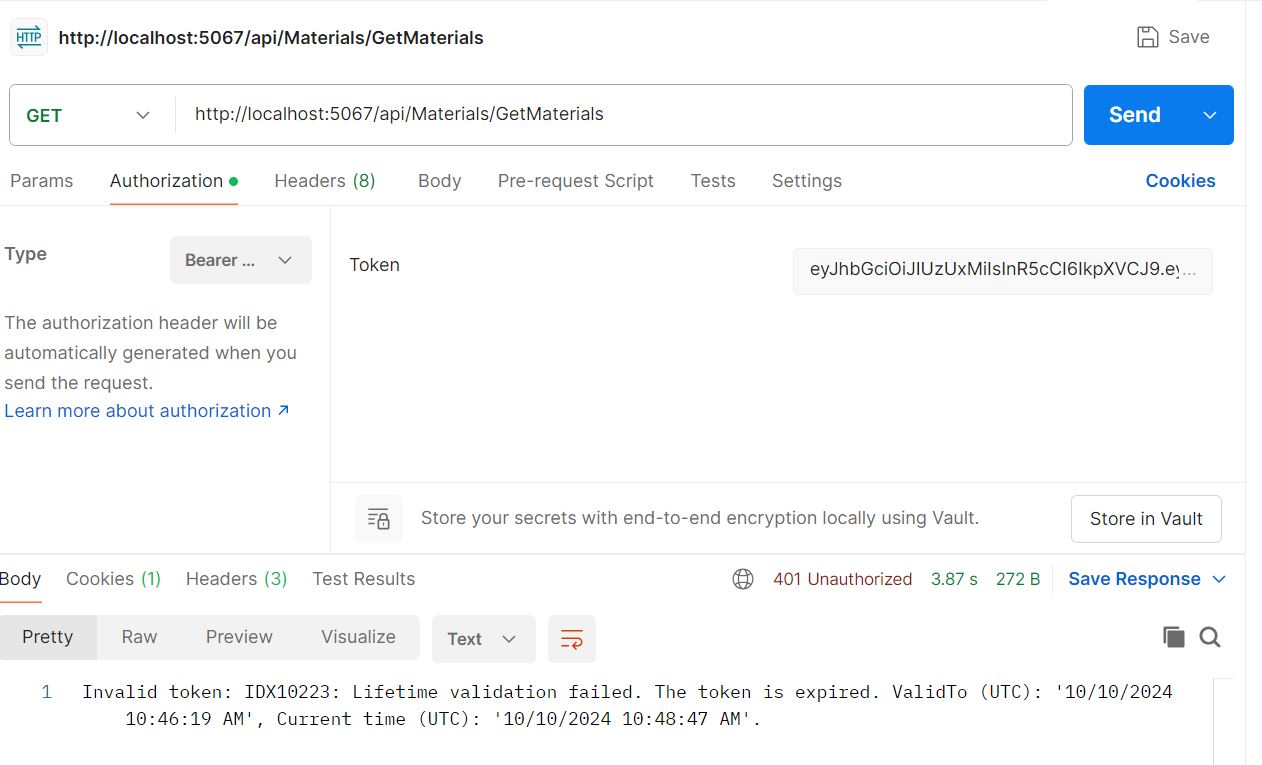
Now we create new token and try to alter original token and hit again the URL. It will show the following message.
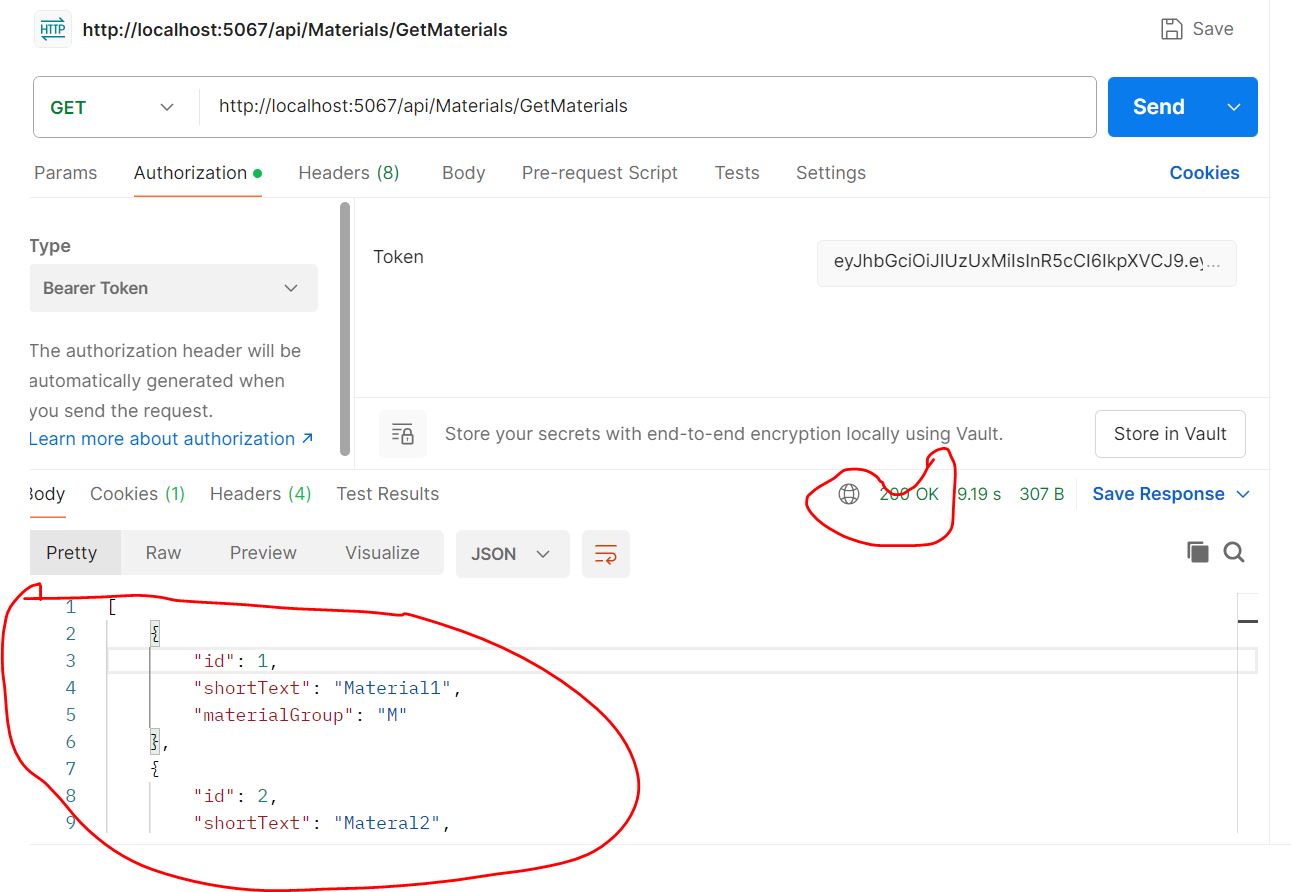
Now enter new token and update old token with new token and and hit again the URL.
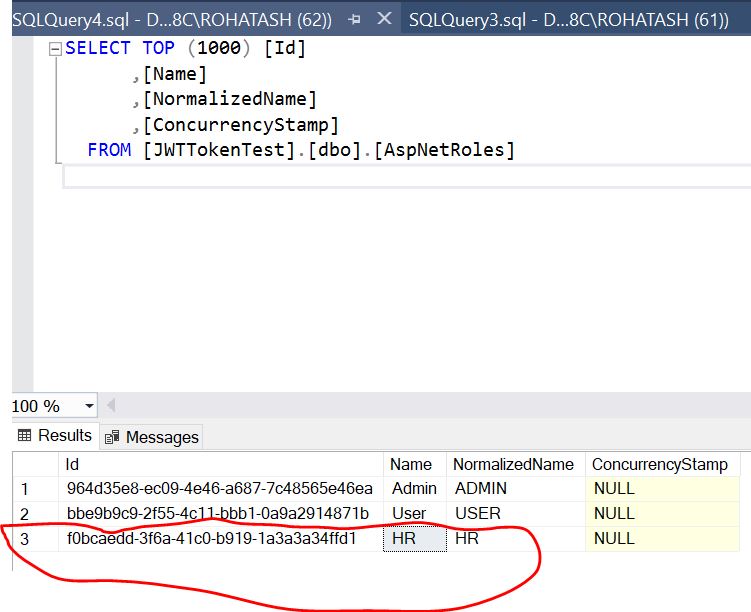
We have already defined role in SQL Table name as AspNetRoles. According to the User login we have defined Role as HR
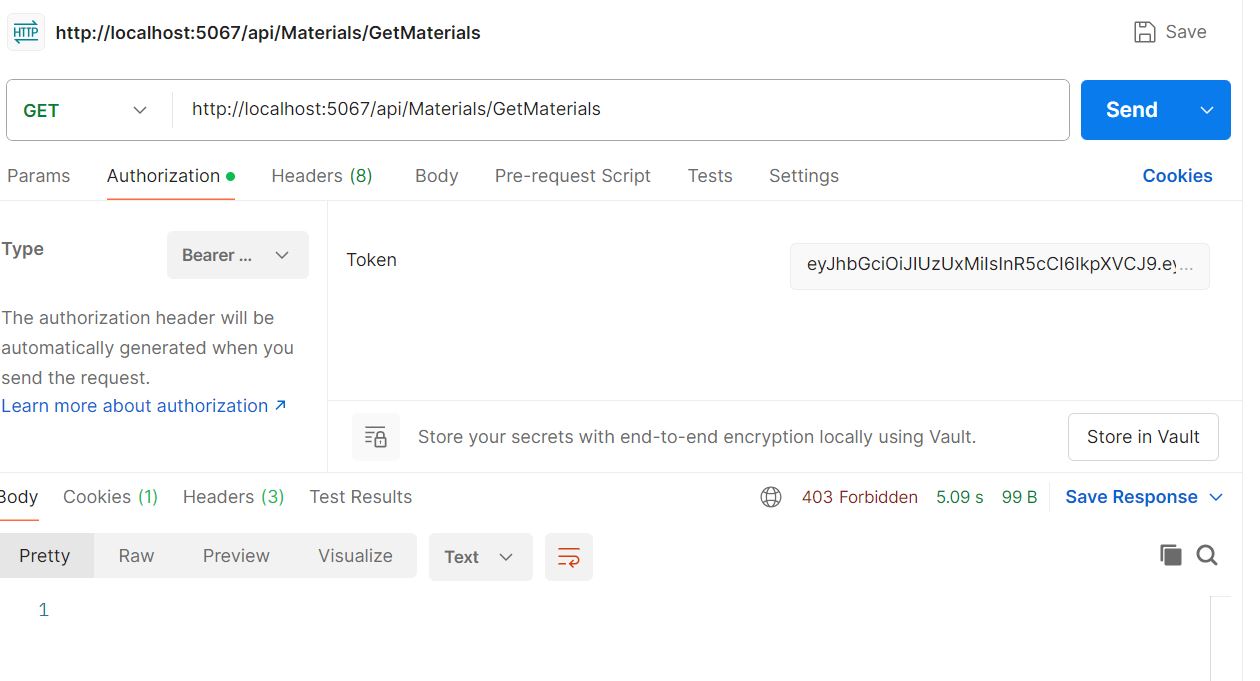
Now replace [Authorize] attribute with the following attribute [Authorize (Roles="DD")]. DD is not a role defined with that User. So data will not show.
Now replace [Authorize (Roles="DD")] attribute with the following HR correct role [Authorize (Roles="HR")]. HR is a role defined with that User. So data will show.
using GenerateToken.BLL.Services;
using Microsoft.AspNetCore.Authorization;
using Microsoft.AspNetCore.Http;
using Microsoft.AspNetCore.Mvc;

namespace GenerateToken.Controllers
{
    [Route("api/[controller]")]
    [ApiController]
    [Authorize (Roles="HR")]
    public class MaterialsController : ControllerBase
    {
        private readonly IMaterialService materialService;

        public MaterialsController(IMaterialService materialService)
        {
            this.materialService = materialService;
        }

        [HttpGet()]
        [Route("GetMaterials")]
        public async Task<IActionResult> GetMaterials()
        {
            var materials = await materialService.GetMaterials();
            return Ok(materials);
        }

        [HttpGet()]
        [Route("GetMaterialDetails")]
        public async Task<IActionResult> GetMaterialDetails(int id)
        {
            var materials = await materialService.GetMaterialDetails(id);
            return Ok(materials);
        }
    }
}
Now run again and hit the URL.
You can also download full code to understand more better way. Please follow the below link.
Download Authentication and Authorization Sample code
Prev Next