C# - Started
C# is a object-oriented programming language that was developed by Microsoft office. It's widely used for developing applications on the Windows platform, including desktop applications, web applications, games and others. Applications written in C# use the .NET Framework, so it makes sense to use Visual Studio, as the program, the framework, and the language, are all created by Microsoft.
To get started with C#, you will need to have a development environment installed on your computer. Microsoft provides a free development environment called Visual Studio Community, which you can download from their website.
Download Visual Studio Tools - Install Free for Windows, Mac, Linux (microsoft.com)
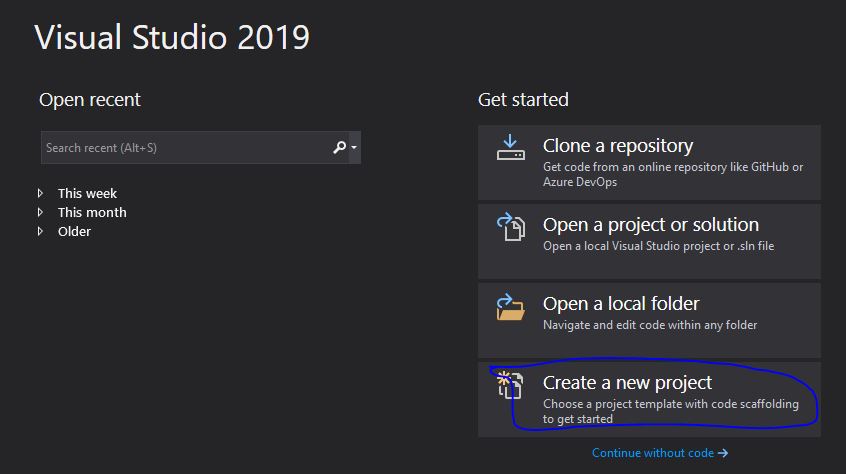
On the start window, choose Create a new project in visual studio 2019.

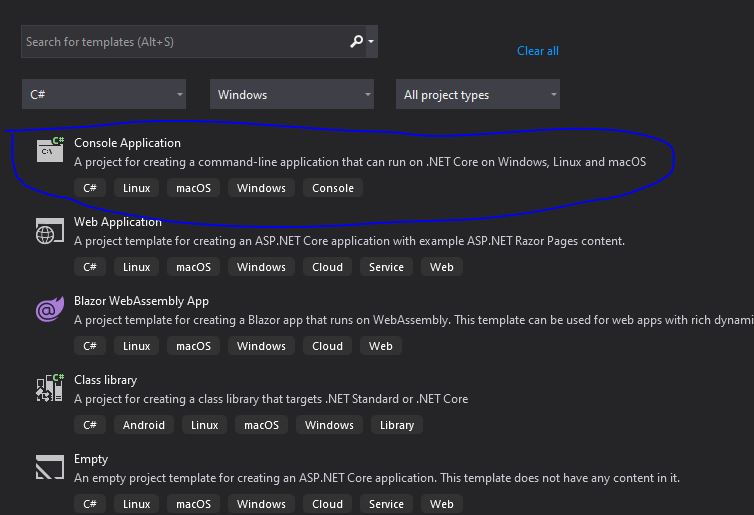
Choose Console Application from the list and click on the Next button:

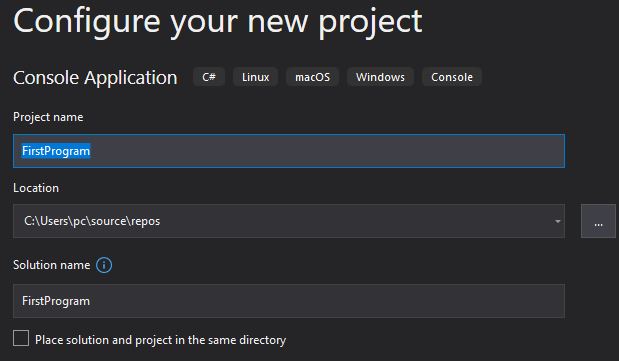
Enter a Project name for your project, and click on the Create button.

Visual Studio will automatically generate some code for your project.

namespace - It is used to organize your code, and it is a container for classes and other namespaces.
The using System - statement at the top of the file imports the System namespace, which contains a lot of useful classes and functions.
The class FirstProgram line defines a new class called FirstProgram.
The static void Main(string[] args) line defines the entry point of the program. This is the method that gets executed when you run the program. The Console.WriteLine("Hello, World!"); line prints the string "Hello, World!" to the console.
Here's an example of a simple C# program that prints "Hello, World!" to the console:
using System;

namespace FirstProgram
{
    class Program
    {
        static void Main(string[] args)
        {
            Console.WriteLine("Hello World!");
        }
    }
}
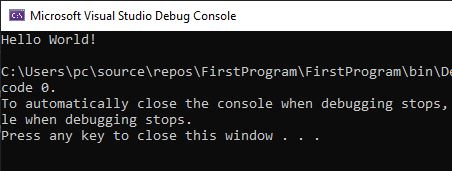
Run the program by pressing the F5 button on your keyboard (or click on "Debug" -> "Start Debugging"). This will compile and execute your code. The result will look something to this.

Prev Next
