ASP.NET Web API-Swagger
Swagger is an open-source tool which help developers design, build, document, and consume RESTful APIs (Application Programming Interfaces). The Swagger specification defines the structure and details of the API endpoints, request/response payloads, headers, authentication methods, and more.
Advantage of Swagger
When you use swagger, You can take following advantages.
- API Design - It provides a structured approach to designing APIs, allowing developers to define endpoints, request/response formats, error handling, and other important aspects.
- API Testing - Swagger UI allows developers to test API endpoints directly from the browser, making it convenient to verify the functionality and behavior of the API.
- API Documentation - Swagger enables the automatic generation of comprehensive and interactive API documentation, making it easier for developers to understand and use the API.
To add to Swagger in web API Project, you need to follow these steps:
Step 1: Create an ASP.NET Web API Project
We use the version of Visual Studio 2019 and .NET Framework 4.7.2 to build the app.
- Start Visual Studio and select Create a new project.
- In the Create a new project dialog, select ASP.NET Web Application (.NET Framework)-> Next.
- In the Configure your new project dialog, enter webapiexample for Project name -> Create.
- In the Create a new ASP.NET Web Application dialog, select Web API -> Create
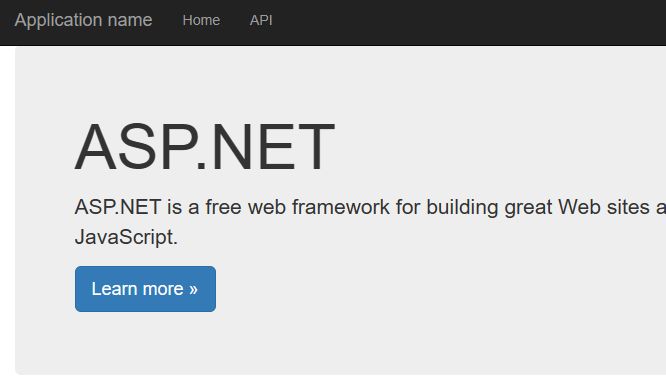
Now build and run the app, you will see the following image shows the application.
Step 2: Add one empty ApiController
Add one empty apiController into the app, with the name as ErrorHandlingWebAPIController:
- Right click Controllers folder -> add -> controller.
- In the Add New Scaffolded Item dialog, select Web API in the left pane, and
- Web API Controller - Empty -> Add.
- In the Add Controller dialog, Change BlogController for controller name > Add.
Step 3: Add code into the controller
We add the following code into the controller.
using System;
using System.Collections.Generic;
using System.Linq;
using System.Web;
using System.Web.Http;
using System.Web.Mvc;

namespace webapiExample.Controllers
{
    public class BlogController : ApiController
    {
        public class Blog
        {
            public int Id { get; set; }
            public string Name { get; set; }
            public string Url { get; set; }
        }
        public static List<Blog> blogList = new List<Blog>()
        {
            new Blog { Id = 1, Name="TutorialsTrend", Url="https://tutorialstrend.com/"},
            new Blog { Id = 2, Name="StackOverflow", Url="http://stackoverflow.com/"},
        };

        // GET api/Blog
        public List Get()
        {
            return blogList;
        }
    }
}
Step 4: Add Swagger Client
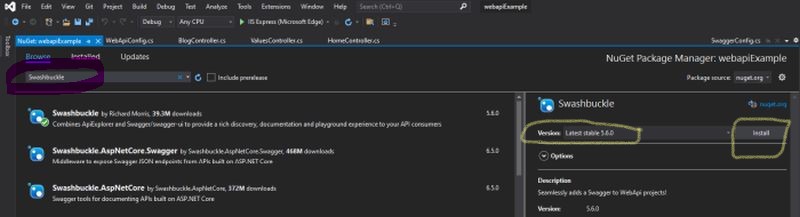
Installing Swagger from NuGet Package Manager, from Visual Studio project.
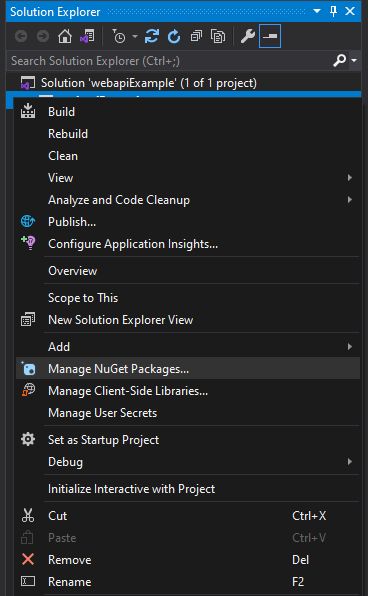
Right click Tools > NuGet Package Manager->Manage NuGet for Solution. In the opened NuGet-Solution dialog - Click Browse, then Search Swagger and Install Swashbuckle 5.6.0
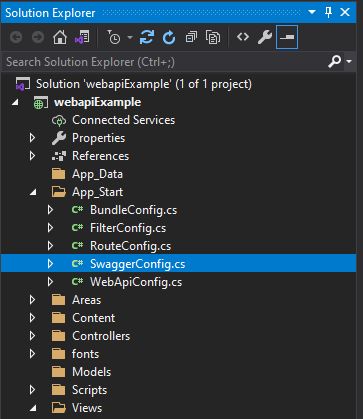
After installation, one more file, SwaggerConfig.cs, added in app_start folder.
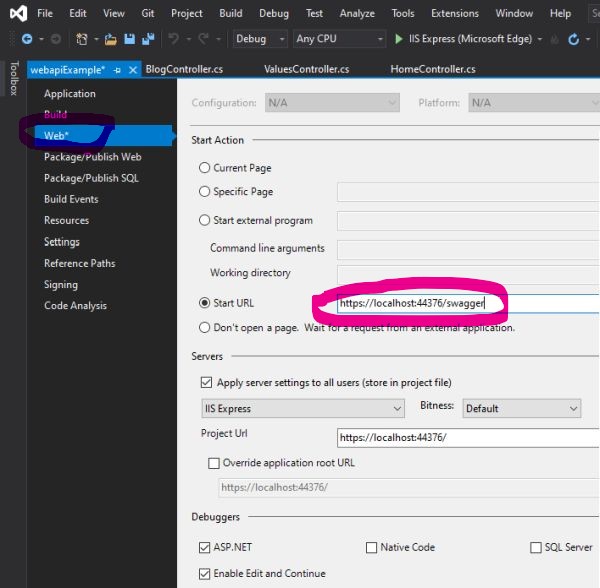
Step 5: Change the default start page to the swagger.
Right click Project -> Properties to open the properties page, then choose Web, in Start URL, add /swagger.
Step 6: Run the project and test swagger.
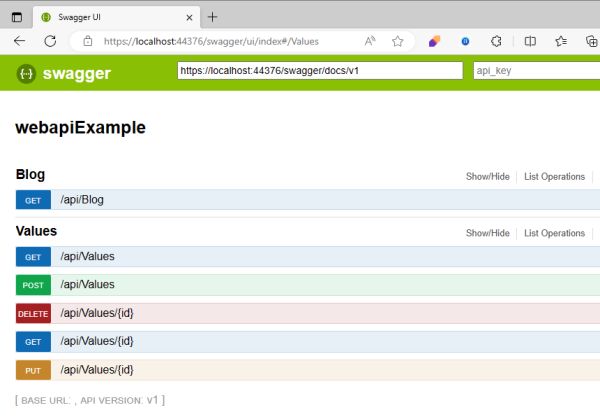
Now Click on the GET to expand the Blog API box.
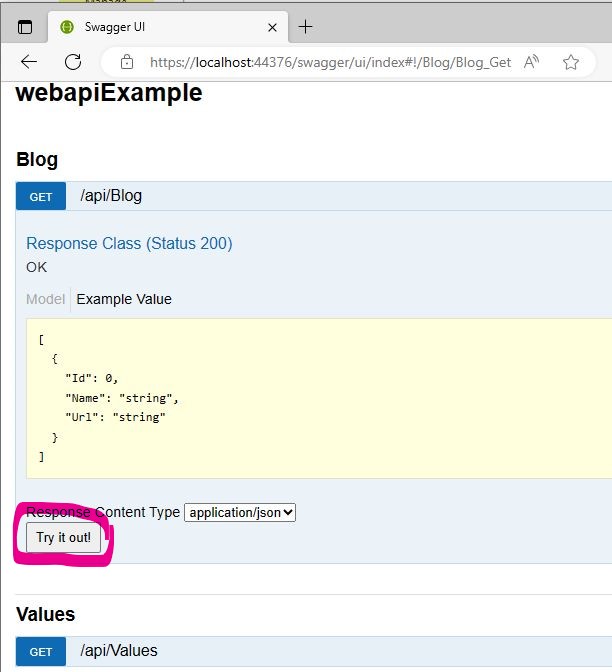
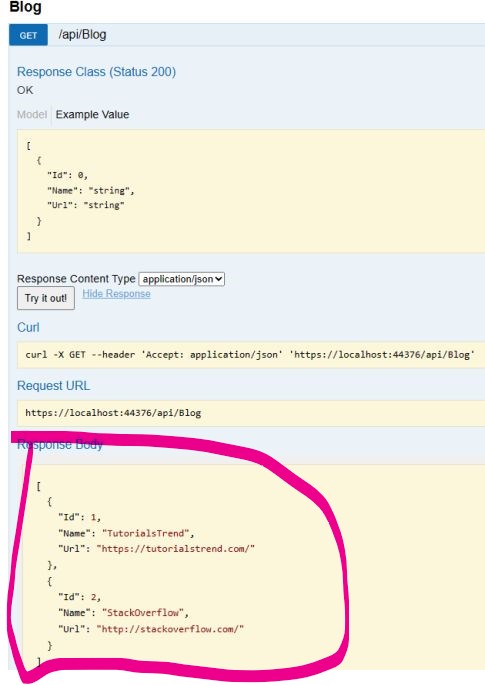
Now click on the Above Try it Out! button. To check return data through API.
Next