Partial Class
In this article we are going to discuss the Partial class in C#. There are many blogs, articles are available on the internet regarding Partial class but in this particular article I will try to explain to you with as much as simplest and realistic examples so you can get a clear idea of the Partial class in C#.
Partial Class Introduction
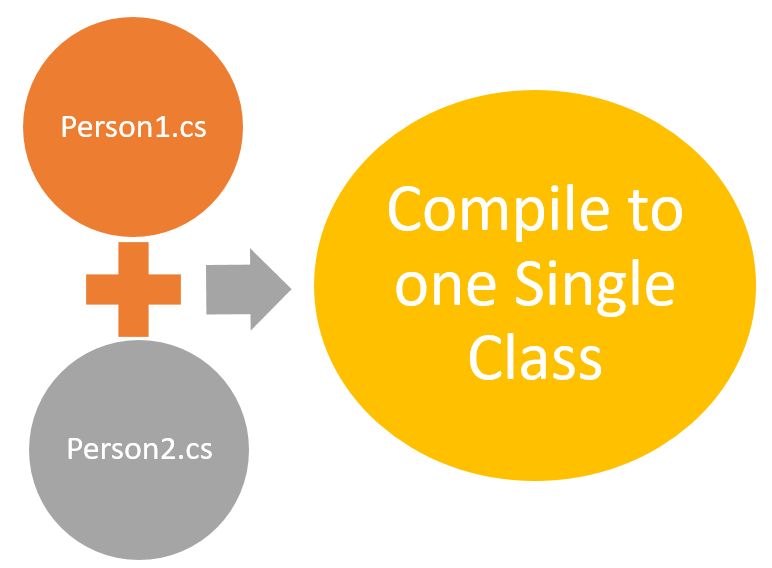
- A partial class allows a single class to be divided into two separate physical files. During compile time these files get compiled into a single class.
- A partial class is created by using a partial keyword.
- The partial keyword indicates that other parts of the class, struct, or interface can be defined in the namespace.
- All the parts must use the partial keyword.
- All the parts must be available at compile time to form the final type.
- All the parts must have the same accessibility such as public, private and so on.
The following class definition defines a partial class in C#:
//partial class
Public partial class PartialClass
{
}
Suppose you have a Person class. That definition is divided into two physical source files, Person1.cs and Person2.cs. Then these two files have a class that is a partial class. You compile the source code and then create it in a single class.
Real World Example
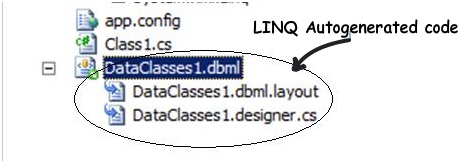
Recetently, In My Project, I am using Entity Framework Database First Approach. In that case, the Entity Framework will create the models i.e. the classes based on the database and it creates the classes as partial classes. Next, I want to do some modifications with the auto-generated partial classes like adding some additional properties or adding some attributes. But, if I do the modification with the auto-generated partial classes, then my changes will be lost when I update the EDMX file. So, what I generally do is, create a partial class, and in that partial class, I do all the customization.
In the following figure you can see how the auto-generated code has partial classes and partial method.
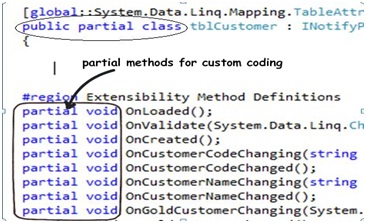
The partial methods later can be extended for including custom logic. For instance, you can see in the following code for the preceding auto-generated class "tblCustomer" we have used partial methods to override the "OnCustomerCodeChanged" event to ensure that the customer code is not more than 6 length.
public partial class tblCustomer
{
    partial void OnCustomerCodeChanged()
    {
        if (_CustomerCode.Length > 6)
        {
            throw new Exception("Customer code can not be greater than 6");
        }
    }
}
So by using partial classes and partial methods, LINQ and EF framework keep auto-generating classes and by using partial methods we can customize the class with our own logic.
Why Partial Classes?
The following are some important points which explain why use partial classes in C#.
- Modularization - Partial classes enable breaking a class's definition into multiple files.
- Organized Development - Developers can work on different parts of a class simultaneously without conflicts.
- Code Generation - Commonly used in tools or frameworks to generate code, while developers can add custom logic separately.
- Maintenance - Enhances code readability and maintainability by segmenting class logic.
- Extensibility - Additional functionality can be added to existing classes without altering the original source code.
Advantages of Partial Class
- With the help of partial classes, multiple developers can work simultaneously in the same class in different files.
- With the help of a partial class concept, you can split the UI of the design code and the business logic code to read and understand the code.
- When you were working with automatically generated code, the code can be added to the class without having to recreate the source file like in Visual studio.
- You can also maintain your application in an efficient manner by compressing large classes into small ones.
For Example
let us understand Partial Class with an example. First, create a console application and then add a class file with the name Student.cs. Once you add the class file, then copy and paste the following code into it. Here, please notice the class name is Student and in this class, we have declared 3 auto-implemented properties i.e. FirstName, LastName and Gender. Here, we have also declared 2 public methods i.e. DisplayName and DisplayStudentDetails.
using System;
namespace PartialClassDemo
{
public class Student
{
public string FirstName { get; set; }
public string LastName { get; set; }
public string Gender { get; set; }
public void DisplayFullName()
{
Console.WriteLine($"Full Name is : {FirstName} {LastName}");
}
public void DisplayStudentDetails()
{
Console.WriteLine("Employee Details : ");
Console.WriteLine($"First Name : {FirstName}");
Console.WriteLine($"Last Name : {LastName}");
Console.WriteLine($"Gender : {Gender}");
}
}
class Program
{
static void Main(string[] args)
{
Student emp = new Student
{
FirstName = "Rohatash",
LastName = "Kumar",
Gender = "Male"
};
emp.DisplayFullName();
emp.DisplayStudentDetails();
}
}
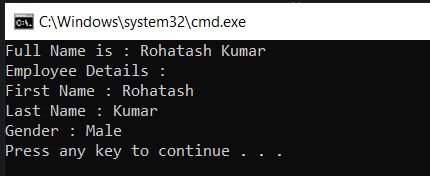
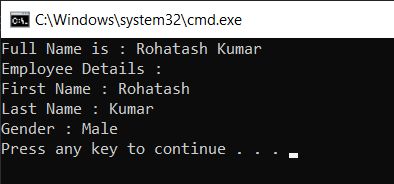
}Output
Splitting Above Class Definition into 2 Files using Partial Classes in C#
Now we split the above Student class definition into two different class files. One class file is going to contain all 3 public auto-implemented properties (FirstName, LastName and Gender) and the other class file is going to contain the two public methods i.e. DisplayName and DisplayStudentDetails that we have defined inside the Student class.
Now we need to add two class files with the name StudentOne.cs and StudentTwo.cs The StudentOne.cs class file going to contain all 3 public auto-implemented properties (FirstName, LastName, Gendar) and the StudentTwo.cs class file going to contain the two public DisplayName and DisplayStudentDetails methods. Even though the class file names are different, the class name is going to be the same, and in this case, we are providing the class name as Student in both the class file as well as we are making the class as partial by using the partial keyword.
StudentOne.cs File
using System;
using System.Collections.Generic;
using System.Linq;
using System.Text;
using System.Threading.Tasks;

namespace partialExample
{
    public partial class Student
    {
        public string FirstName { get; set; }
        public string LastName { get; set; }
        public string Gender { get; set; }
    }
}
StudentTwo.cs File
using System;
using System.Collections.Generic;
using System.Linq;
using System.Text;
using System.Threading.Tasks;

namespace partialExample
{
    public partial class Student
    {
        public void DisplayFullName()
        {
            Console.WriteLine($"Full Name is : {FirstName} {LastName}");
        }

        public void DisplayStudentDetails()
        {
            Console.WriteLine("Employee Details : ");
            Console.WriteLine($"First Name : {FirstName}");
            Console.WriteLine($"Last Name : {LastName}");
            Console.WriteLine($"Gender : {Gender}");
        }
    }
}
Using the Partial Class in C#
Now, we are going to use the Partial classes whose definition is split across two different class files. We need to use the Partial class just like a normal class. We can create an instance and we can also invoke the members using the instance.
using System;

namespace partialExample
{
    class Program
    {
        static void Main(string[] args)
        {
            Student emp = new Student
            {
                FirstName = "Rohatash",
                LastName = "Kumar",
                Gender = "Male"
            };
            emp.DisplayFullName();
            emp.DisplayStudentDetails();

        }
    }
}
Output
When do we need to use Partial Class in C#?
There are several situations when splitting a class definition is desirable
- Organization - For very large classes, breaking down the class into logical chunks (e.g., grouping methods by their functionality) can make the codebase easier to navigate and maintain.
- When working on large projects, splitting a class over separate files allows multiple programmers to work on it simultaneously.
- When working with automatically generated source code, the code can be added to the class without having to recreate the source file. Visual Studio uses this approach when creating windows form, Web service wrapper code, and so on.
- Code generation - In scenarios where parts of the codebase are generated automatically (e.g - designer files in Windows Forms, web service reference classes, or entities in Entity Framework), separating auto-generated code from custom code through partial classes helps in maintaining the codebase. It ensures that manually written code does not get overwritten by the auto-generation process.
Next