Encapsulation
In this article we are going to discuss Encapsulation in C#. There are many blogs, articles are available on the internet regarding Encapsulation but in this particular article I will try to explain to you with as much as simplest and realistic examples so you can get a clear idea of the Encapsulation use in C#.
Encapsulation Introduction
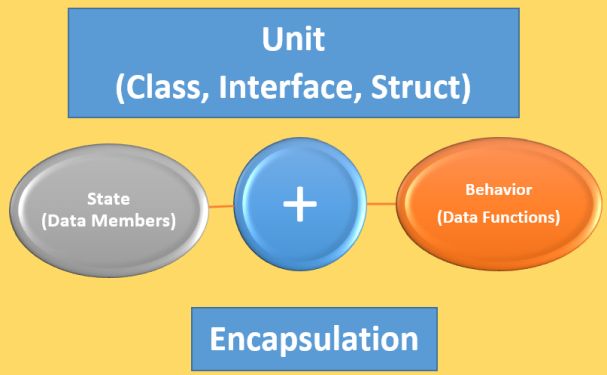
The process of binding or grouping the state(Data Members) and behaviour(Data Functions) together into a single unit(class, interface, struct) is called Encapsulation in C#.
We can define the above as following.
- State - Data Members
- Behavior - Data Functions
- Unit - class, interface, struct
The Encapsulation Principle ensures that the state and behavior of a unit (i.e., class, interface, struct, etc.) cannot be accessed directly from other units (i.e., class, interface, struct, etc.).
In C#, this is typically achieved through the use of classes. The idea behind encapsulation is to keep the implementation details of a class hidden from the outside world, and to only expose a public interface that allows users to interact with the class in a controlled and safe manner.
Real-World Example of Encapsulation
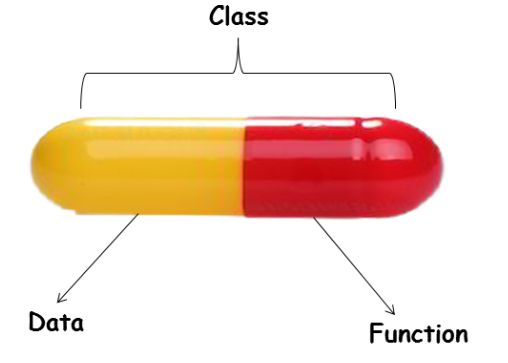
As we already discussed, one of the real-world examples of encapsulation is the Capsule, as the capsule binds all its medicinal materials within it. In the same way, C# Encapsulation, i.e., units (class, interface, enums, structs, etc) encloses all its data member and member functions within it.
Example
We want to create a BankAccount class with encapsulated attributes such as balance, and methods like Deposit, Withdraw, and GetBalance. We'll encapsulate these attributes by making them private and provide public methods to interact with them.
public class BankAccount
{
    private decimal balance;

    public BankAccount(decimal initialBalance)
    {
        balance = initialBalance;
    }

    public void Deposit(decimal amount)
    {
        balance = balance + amount;
    }

    public void Withdraw(decimal amount)
    {
        if (balance >= amount)
        {
            balance =balance- amount;
        }
        else
        {
            Console.WriteLine("Invalid withdrawal amount or insufficient balance.");
        }
    }
    public decimal GetBalance()
    {
        return balance;
    }
}

class Program
{
    static void Main(string[] args)
    {
        BankAccount myAccount = new BankAccount(1000);

        myAccount.Deposit(200);
        Console.WriteLine("Balance: " + myAccount.GetBalance());

        myAccount.Withdraw(800);
        Console.WriteLine("Balance: " + myAccount.GetBalance());
    }
}
Output

Advantage of Encapsulation
Encapsulation offers several advantages, which I'll explain in simpler terms:
- Data Hiding - Imagine you have a box with a secret mechanism inside. You don't need to understand how the mechanism works to use the box. Similarly, with encapsulation, users of a class don't need to know how the class stores its data. They only interact with the class through specific methods (like passing values to functions) without seeing what's happening inside.
- Increased Flexibility - Think of a toy that you can only play with but can't change its parts. With encapsulation, we can control how users interact with the data in our class. We can decide if they can only look at the data (read-only) or if they can change it (write-only), depending on what we need. If we want them to only see the data, we use a "Get" method. If we want them to only change it, we use a "Set" method.
- Reusability - Imagine you have a toolbox with different compartments for different tools. You can use the same tools for different jobs because they're organized and easy to find. Encapsulation organizes our code in a way that makes it easier to reuse. So, if we need to use our class in different parts of our program or in different programs altogether, we can do it easily.
- Testing Code is Easy - Picture building a Lego set. Each piece fits together in a specific way. When you test each piece, you can be sure it works as intended before putting them all together. Encapsulated code is similar; it's easier to test each part separately (unit testing) to make sure they work correctly. This makes finding and fixing problems in our code much simpler.
Disadvantage of Encapsulation
Debugging More Challenging - One disadvantage of encapsulation is that it can make debugging more challenging. Since encapsulation hides the internal workings of a class or module, when errors occur, it can be harder to pinpoint the exact cause. Developers may need to spend more time tracing.
Next